Double click the ProofStation icon on your desktop

Or:
From your start menu select Programs\ParkerFranklin\ProofStation
You can use this step by step guide to get you going quickly with ProofStation. If you would like any assistance at all with getting started, please give us a ring on 0845 094 9183 and we will be very happy to talk you through it.
This guide will assume that when installing the software you have gone with the default file locations.
Either:
Double click the ProofStation icon on your desktop
Or:
From your start menu select Programs\ParkerFranklin\ProofStation
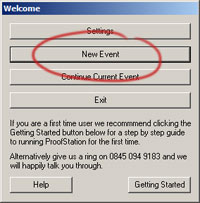
At the welcome screen click New Event
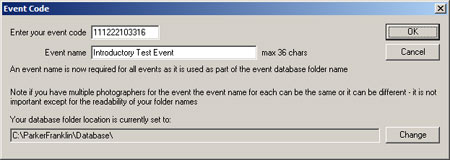
The Event Code dialog will appear. It is critical that each new event has a new unique event code; this is normally obtained from an account we will give you on our ordering web site. However for test purposes only you can use the code 1112 2210 3316. Enter this code (spaces are optional) and a name for your test event and click OK.
Click OK again on the next dialog to go with the defaults (nothing selected).
You will now be asked to navigate to and open two files; the Order Form Template and Pack Details files. The order form template file tells ProofStation how to layout the order forms and the pack file contains details about the packs you have selected for this job.
These files are normally generated by our programs PackCoder and ProofLayout, however to get you started quickly, some sample files were installed with the software at C:\ParkerFranklin\Files\SampleJob.
For the order form layout file open OrderFormLayout.txt (the extension .txt may be hidden). For the pack details file open PackDetails.csv (the extension .csv may be hidden). Note that this layout is normally printed on paper that has been pre-printed with appropriate backgrounds:
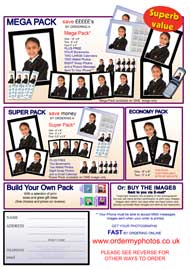
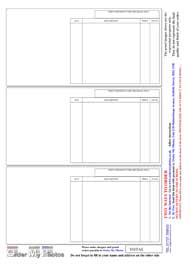
Without these pre-printed pages you will only see the elements that get printed by ProofStation (proof images, barcodes, prices etc). Pre-printing these backgrounds serves two main purposes; it means the printing on the day will typically run faster and it is generally cheaper to get these pages printed with the backgrounds in bulk by a commercial printer, rather than using a lot of expensive ink on an inkjet (or even laser) printer.
Also note that printing order forms in this way is only one option; you can still use photographically printed proof cards if you prefer that approach.
Go with the defaults for the next two dialogs.
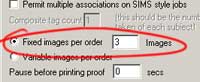
On the next set the value in "Fixed images per order" to 3 and click OK (this tells ProofStation to print three proof images on each order form).
On the next select Yes to begin with printing enabled (ensure you have a printer connected and loaded with A4 paper).
Then go with the defaults on the next two dialogs
Full details about these dialogs can be found in the user manual.
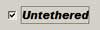 Click the Untethered box on the right (this is a more convenient mode for demo purposes).
Now simply find three images using "My Computer" or "Windows Explorer" and drag and drop them straight into the ProofStation window (of course this would normally have been done by tethering your camera to the laptop by USB or similar).
Note: Images must be greater than 200kb in size to work.
An order form will be printed with proofs of the three dropped images, a barcode for unique identification back in our lab and details of the packs and prices taken from the sample pack details file. These details would normally have been printed onto paper with pre-printed background, instructions etc. See ProofLayout for examples.
You can continue dragging and dropping more images to further test the software.
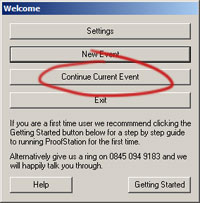
After an event has been run once it can be quickly re-run later. Simply run ProofStation again and this time click Continue Event.
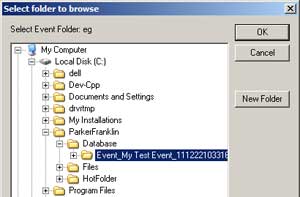
At the next dialog browse to and select the event folder for the event you wish to continue. Assuming you went with all the defaults at installation the event database folder should be in a subfolder below C:\ParkerFranklin\Database and the actual folder with "Event_" followed by the name you gave the event followed by "_111222103316_database". So if you called the event "My Test Event" the event database folder will be "Event_My Test Event_111222103316_database". Select this folder and click OK.
Then continue as for the third dialog in Step 4 above.
When dropping your images in you may find them rotated. You can apply an automatic rotation to get them the right way up as they come in.

Click More then Settings and then click the icon that best suits the way you shoot.
To see our software working with your camera you need to "tether" it to the laptop. This is done by using your camera's capture software eg. Nikon Capture. The settings in your software will specify a folder where each image is to be sent. You can either note this folder down and edit the "Source (hot) Folder" in ProofStation to match (found at More then Settings). Or ask your capture software to point to C:\ParkerFranklin\HotFolder (which was created for you when you did the installation and is the default source hot folder for ProofStation).